Quick Start#
Proposed software can be used the same way for every project. This page will explain how to have operational configuration the fastest way possible.
Caution
Even if it is not the recommended method, a package compatible with Arduino IDE is provided for INS SENSORS ONLY project, and documented HERE: Arduino IDE packaged code
0. Use Sysrox Dashboard to build and flash code#
A dashboard is available to build and flash code, with prebuilt versions to help you test your device!
The dashboard can be accessed at: Sysrox dashboard
1. Choose your project manifest or release archive#
Every project code is indexed by a manifest file which is used to grab all necessary repos and keeping them in sync. Initializing and syncing the project is just done with:
Manifest adresses are referenced here:
Manifests

Releases archives can also be found in the same place if you can not or do not want to use repo!
2. Get code#
(Unix) With Repo#
2.1. Install Repo#
Linux#
sudo apt-get install repo
If your distribution does not have a repo package, you can do:
mkdir -p ~/.bin
PATH="${HOME}/.bin:${PATH}"
curl https://storage.googleapis.com/git-repo-downloads/repo > ~/.bin/repo
chmod a+rx ~/.bin/repo
Macos#
brew install repo
2.2. Use repo#
Inside the folder in which you wan to work, you have first to repo init with a project manifest:
example
repo init -u https://git.sysrox.com/code/manifests/manifest_ins.git
and then repo sync the files.
repo sync
When you want to update all the repository relatively to the distant server, just use repo sync again with keep all the repos up to date
(Unix)(Windows) Using release zip file#
You can grab all the repos with using .zip file generated with a release:
Releases links are available in the projects manifests page:
Manifests
The code is inside artifacts/release_V0/code
3. Install toolchain#
(Windows + Unix) Install editor with platformio#
The easiest way to be able to edit and compile the code for your platform is to use editor (Vscode for our example) with the platformio extension:
Tip
With the extension installed, every platformio commands can be used with sourcing the environment:
source ~/.platformio/penv/bin/activate
(Unix) Directly use platformio#
If you use an editor without a platformio extension, you can just install PIO CLI to have access to all toolchains easily:
pip install -U platformio
4. Initialize project#
(Windows + Unix) Use platformio terminal#
First create a symlink or copy the file src/PROJECT_NAME/conf/conf.ini at the same level as src and lib folders, and rename it platformio.ini.
example
Unix:
ln -s src/appDM_ins_esp32s3/conf/conf.ini platformio.ini
Windows (powershell with administrator priviledges):
New-Item -ItemType SymbolicLink -Path platformio.ini -Target .\src\appDM_ins_esp32s3\conf\conf.ini
To init the project, we need to use platformio terminal. Open Vscode and open your project from the platformio icon:
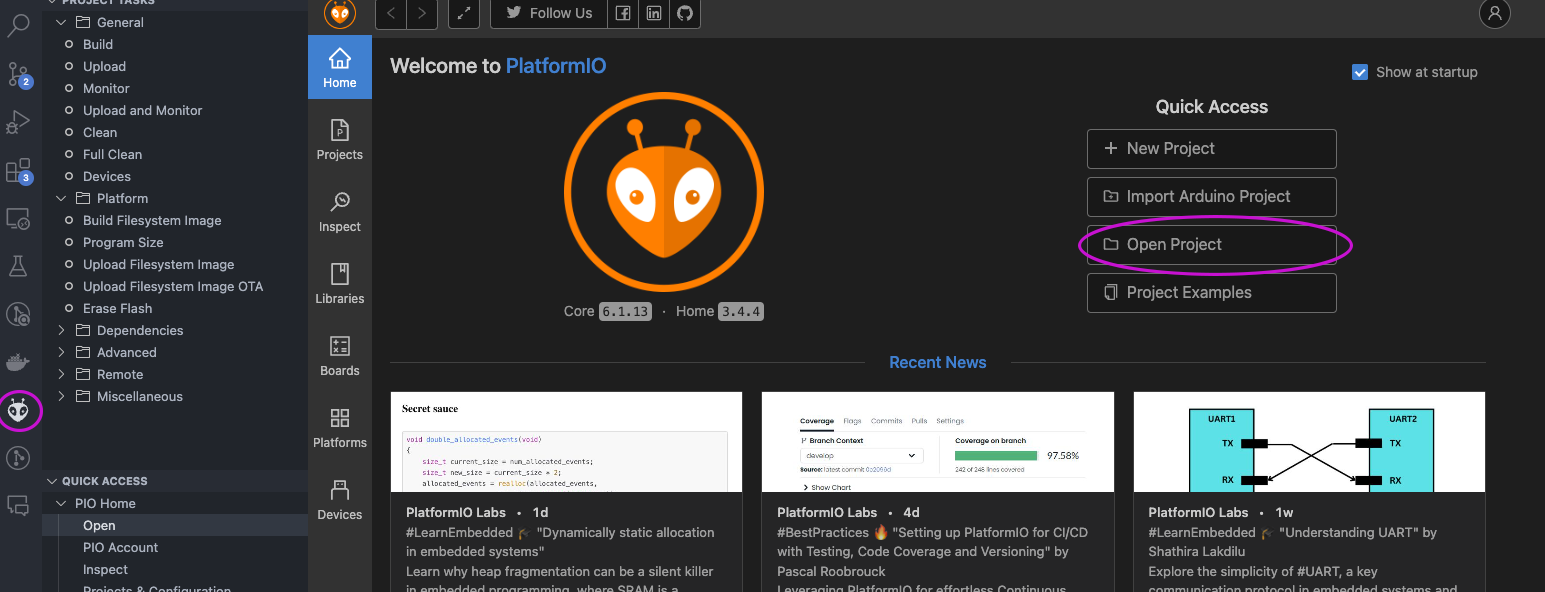
Go back to Vscode file explorer (first icon on top left) and use CTRL+MAJ+P (CMD+MAJ+P) to open vscode command explorer. Search for PlatformIO: New Terminal and press Enter. A platformio terminal will open on the bottom of the page. It will give access to pio commands.
Tip
The same terminal can be accessed with sourcing the Platformio python environment:
source ~/.platformio/penv/bin/activate
If platformio Cli has been installed through Pip, the command will be directly accessible through standard terminal
The project can now be initialized with using the PlatformIO terminal:
example
pio init -e lolin_s3
5. Build project and flash code#
To build the code, we can still use the PlatformIO terminal:
example
pio run -e lolin_s3
To flash the code to a plugged ESP32:
example
pio run -e lolin_s3 --target upload
Attention
The platformio.ini file is configured to ESP32 N16R8. If you use a different chip, do not hesitate to customize the platformio.ini file with a different board, f_flash, partitions… You can use This page to help selecting a similar board configuration.